
svgTrinusifier v2.0.2
Instructions
Safety first! Always wear your safety equipment while working with lasers! This is not an editing app, it simply does a translation for you, point by point, from your SVG to Trinus compatible Gcode. It's not perfect, this solution is pretty much another hack. Use at your own risk.
Download the application for your platform.
Windows: use 7zip or similar to extract the downloaded file. You might have to do it twice since it's a tar.xz file (extract xz then extract tar).
Mac: use Unarchiver to extract the downloaded file.
Use the sample SVG provided as a starting point.
Best results will happen if your file consists of only LINES. Filled areas will be ignored and only their edge will be etched. You can give the Fills experimental option a try or you can generate a fill pattern in your vector editing application (like Adobe Illustrator), think in lines. For areas where you need multiple passes — just duplicate the shape on top of itself.
Fewer points mean less time to calculate and less time to print, so make sure to optimize your paths as much as possible. Best practice is to distribute your points evenly.
There's no movement optimization as of now. Arrange your layers according to how you want the draw progression to be. Bottom layers get etched first, top ones last.
Adjust your settings to your needs and load up your file. If you need to readjust anything, you'll have to regenerate by pressing the Reload button. The conversion is very processor intensive to calculate so it might take some time, depending on how much complexity there is in your file.
Clear all will clear all your settings and reload the application so you can start over at any point.
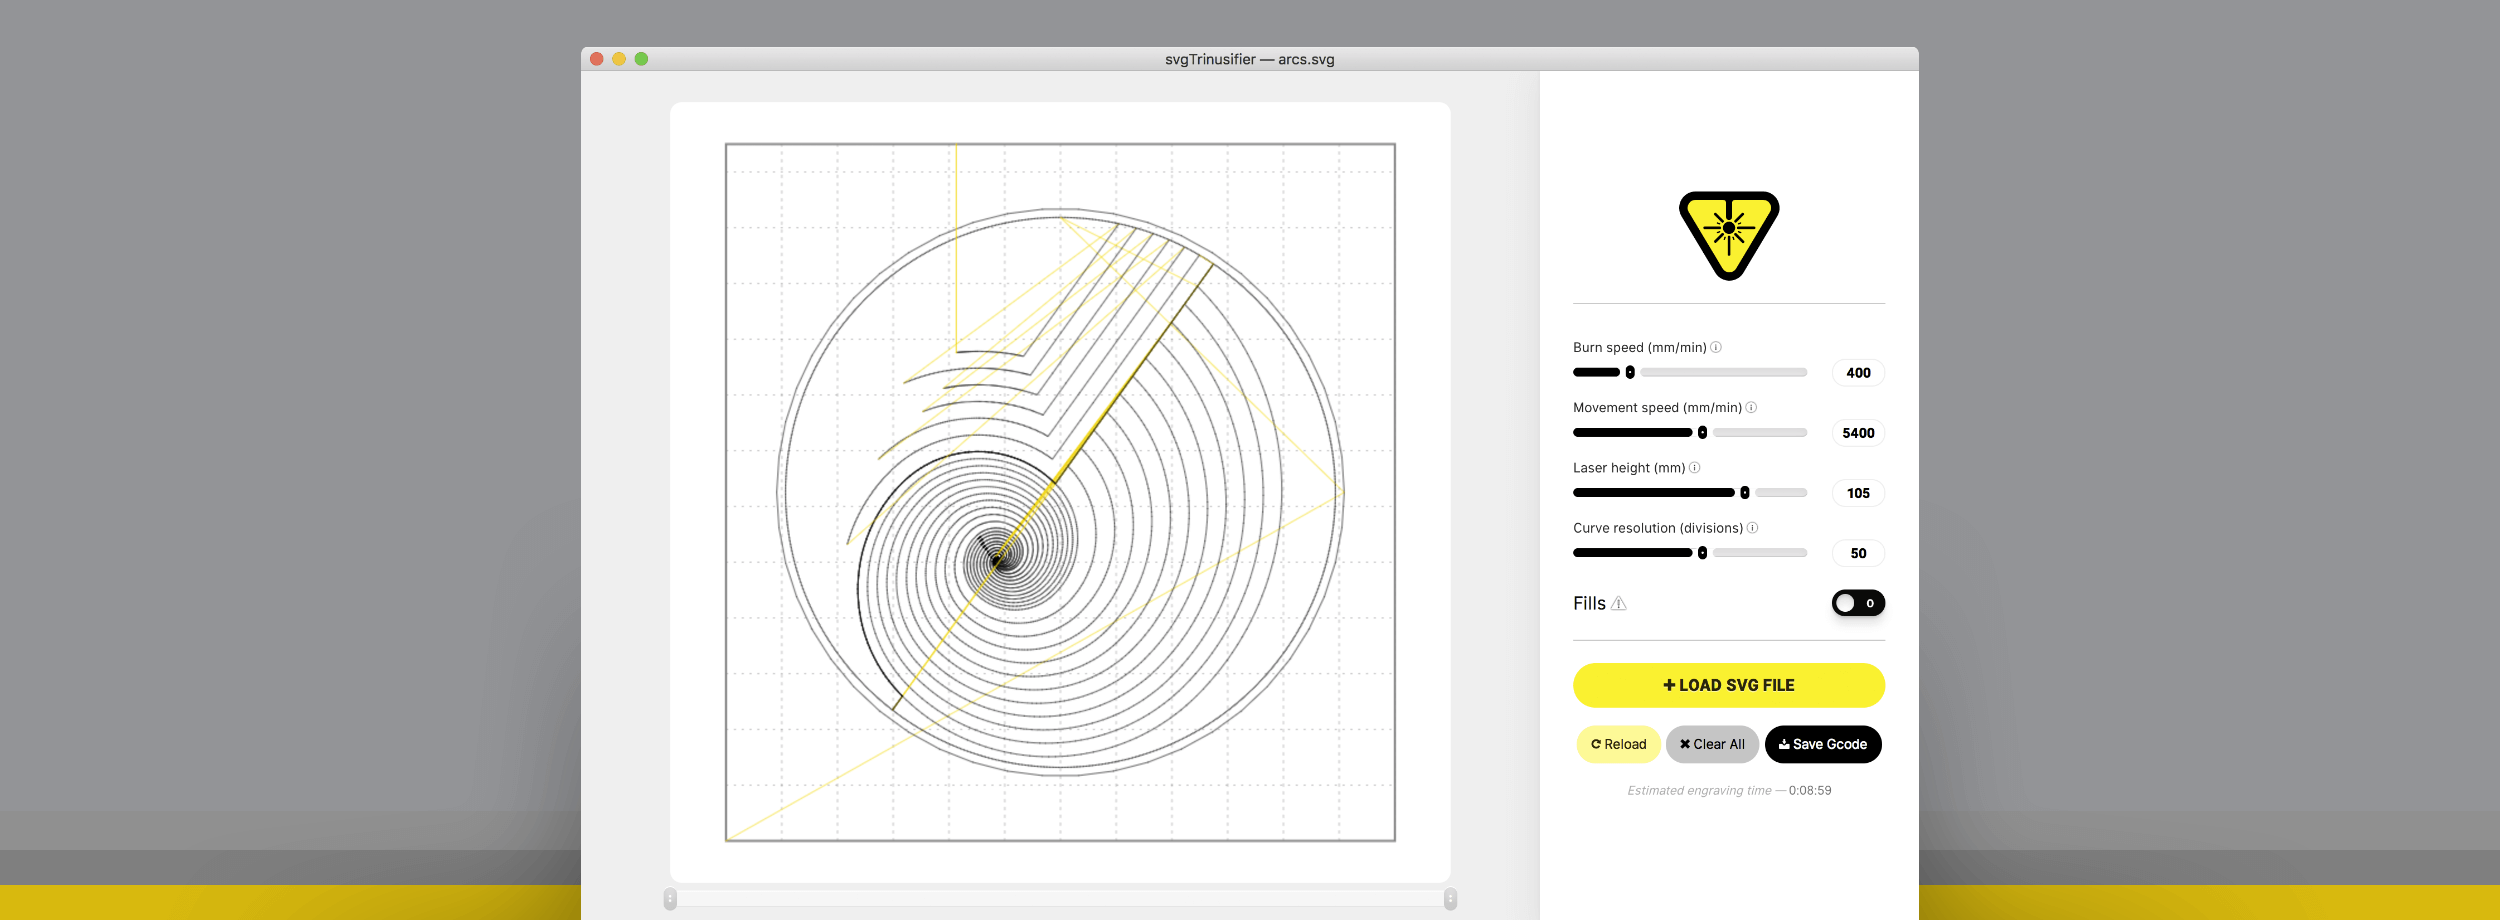
After the conversion is done, there will be a preview generated from the actual Gcode. This means, what you see as a preview is what your Trinus is going to see as well. Yellow lines are movements, the black ones are laser burns. The preview grid is 10 mm resolution and the area of the grid is exactly the same size (120 mm x 125 mm) and orientation as the print bed of the Trinus.
If you're happy with the results, press Save Gcode, name your file and you're done. You can use your SD card with the generated Gcode copied and renamed to autoprint.gcode
Important
Very important to stick to the proper SVG specs! 120mm x 125mm, SVG ver 1.0, CSS Properties: Presentation Attributes, Decimal Places: 6. Here's a settings guide in Adobe Illustrator:

Think of your vector file as the bed of the Trinus, same size, same orientation.
Make sure to delete paths that you don't want to print. Paths with no strokes will still get printed.
If you use Inkscape, play around with the SVG formats (Plain SVG, Optimized SVG). The most important thing is to expand your shapes before saving — Inkscape tends to leave shapes open otherwise, which will result in weird unclosed lines at etching. Number of significant digits for coordinates set at highest (at least 5) is always better for more precise lines.
Notes
If you need help prepping files, I've set up a Fiverr account, hit me up and I might be able to help you out.
I'm developing this app on my free time, which these days I don't get a lot of, unfortunately. If you have inquiries / requests / ideas / suggestions, or you'd like to show me what you did, drop me a line at no-reply@vandenmar.com.
If you find svgTrinusifier useful, consider supporting its development.